Embedded Booking
Add your Otake booking calendar to any website and let visitors book without leaving the page.
In 3 steps
Open Booking → Events, find your event, click Add to website.
Set width, height, and color mode → open the HTML Code tab → click Copy.
Paste the snippet into any HTML or embed block on your website.
Overview
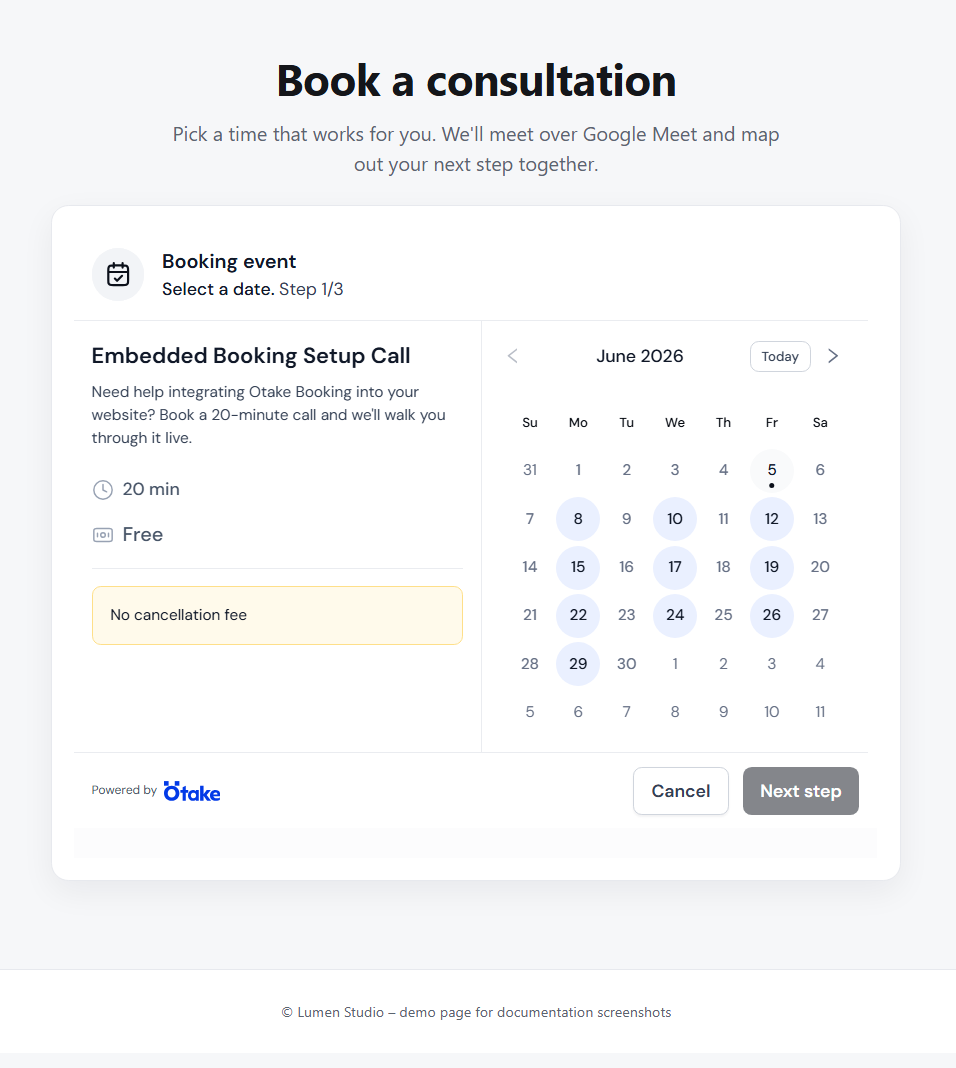
Otake Embedded Booking lets you place a fully functional booking widget on your website, portfolio, landing page, or client portal. Visitors can view your event details, browse available dates, choose a time slot in their own timezone, fill in their details, and complete the booking - all without leaving your site.
The widget stays connected to your Otake event automatically. When you change the event name, schedule, duration, price, or availability in Otake - the widget updates everywhere it's embedded. No code change required.
Use Embedded Booking when you want to
- let clients book without redirecting them to another site
- keep the entire booking experience inside your own website
- reduce friction and improve conversion
- keep event details always up to date automatically
Before you start
Make sure that:
- you have an active Otake account on a paid plan
- Booking is enabled with an active subscription
- you have at least one booking event created
- your website supports custom HTML or an embed block
Get your embed code
- Open Booking in your Otake dashboard
- Go to Events
- Find the event you want to embed
- Click Add to website on the event card
- Adjust width, height, and color mode if needed
- Open the HTML Code tab
- Click Copy
- Paste the code into your website
The embed code
The snippet contains a container div and the Otake widget script. The script mounts the booking iframe automatically.
<div
  class="otake-booking"
  data-page-id="YOUR_PAGE_ID"
  data-event-id="YOUR_EVENT_ID"
  data-theme="light"
  data-width="auto"
  data-height="auto"
></div>
<script src="https://otake.io/widgets/booking-widget.js" async></script>data-page-id and data-event-id automatically. Do not build the snippet by hand.Attribute reference
| Attribute | Required | Values | Default | Description |
|---|---|---|---|---|
class="otake-booking" | Required | — | — | Marks the container the script mounts the widget into |
data-page-id | Required | UUID | — | Your Otake page ID. Filled in automatically. |
data-event-id | Required | UUID | — | The event to embed. Filled in automatically. |
data-theme | Optional | light / dark | light | Visual theme of the widget |
data-width | Optional | auto / px (320–1200) | auto | Widget width. auto fills container up to 732px. |
data-height | Optional | auto / px (522–1200) | auto | Widget height. auto adjusts to booking step from 573px. |
Good to know
- The script loads asynchronously and only once, even with multiple widgets on the same page
- You can embed multiple events on one page - use a separate snippet for each with its own
data-event-id
Customization
Adjust the widget appearance in the Add to website dialog before copying the code.
| Option | Values | What it does |
|---|---|---|
| Width | Auto / Custom px | Auto fills the container up to a 732px max layout width. Custom sets a fixed pixel width (320–1200px). |
| Height | Auto / Custom px | Auto adjusts to fit the current booking step, starting from 573px. Custom sets a fixed height (522–1200px). |
| Color mode | Light / Dark | Changes the visual theme of the widget to match your website. |
What updates automatically vs. what needs a new copy
- Event details — name, duration, price, availability, description load dynamically. No code update needed when they change.
- Style options — width, height, color mode are saved inside the snippet. After changing them, copy the updated code and replace the old snippet on your site.
Responsive behavior
The widget is responsive. In wide containers, event info and the calendar appear side by side. In narrow containers, the layout stacks vertically so both stay readable.
- Use
data-width="auto"unless the target site requires a fixed width - Use
data-height="auto"unless the layout requires a fixed iframe height - Avoid placing the widget in containers narrower than 320px
- On mobile pages, make sure the parent container uses the full viewport width
Add to your website
The universal rule: find any HTML / Embed / Custom code block on your platform and paste the full Otake snippet — container div and script tag together. If your platform supports custom HTML and scripts, Otake will work there.
Step-by-step per platform
- Open WordPress admin → open the page or post
- Add a Custom HTML block
- Paste the full Otake embed code
- Preview the page → Publish
How visitors book
When a visitor opens a page with your embedded widget:
- The widget loads inside your site
- The visitor sees the event details and available dates
- Time slots are shown in the visitor's local timezone, detected automatically by their browser
- The visitor selects a date
- The visitor selects an available time slot
- The visitor fills in the booking form:
- Name — required
- Email — required (one address only)
- Comment — optional
- The visitor accepts the standard Otake booking terms
- Booking is confirmed. For paid events, the payment step is handled inside the embedded flow.
If Booking is disabled
If you disable Booking on your Otake account or page, all embedded widgets connected to it stop working immediately. Visitors see an unavailable state instead of the calendar. Re-enabling Booking restores the widget automatically - no code change needed.
Before disabling, Otake shows a warning:
FAQ / Troubleshooting
data-event-id. The script mounts all of them..otake-booking container and the <script> tag.data-height="auto".data-theme, data-width, data-height. Recommended path: change in Otake and copy the updated code so the preview stays accurate.Need help?
Still stuck after troubleshooting?
Contact us at support@otake.io